Maybe you have been inspired by some awesome fabric prints you’ve seen online. Maybe you have a particular fabric printed project in mind. Or maybe (like me) you’re a serial skill-collector and you’re just looking for the next fun tool to add to your arsenal. Whatever the reason, this fun 3D printing technique will open up a lot of possibilities.
So why print onto fabric? Because it’s cool! You can make something interesting and wearable to show off, or give it to a loved one. Here are some example ideas:

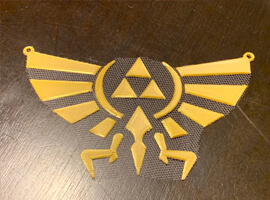
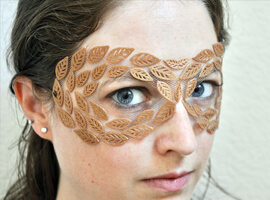

Top left: Snapdragon by David Shorey I believe David invented the idea. I love his scales and think they would be great for cosplay or fashion. I was originally inspired to try fabric printing after seeing his work. “Floating” Hylian Crest pendant by SpaceLemur34 (top right), and Flexible 3D Print Masks by Penolopy Bulnick (bottom left) were both inspired by my Floating Necklace (bottom right). I really think that both of these makers did super cool, innovative things with the technique.
Process Overview
The basic process for printing onto fabric is to print 3 layers, pause the print, insert some fabric, and continue the print to completion.
The basic process of 3D printing onto fabric.
In essence, that’s all there is to it, however, creating any product we make design choices to suit the purpose of the final piece. Even if our goal is aesthetics, these choices are relevant and important.
There are 4 main areas for consideration in a fabric printing project: the model design, the fabric choice, the slicer settings, and the printing itself.
Fabric Designs
When looking for, or designing a model that’s suitable for fabric printing, it’s important to remember the movement of the fabric. Pick a model that is made of many smaller parts, rather than one big block, and ensure there is adequate space between the parts to enable the fabric to move.
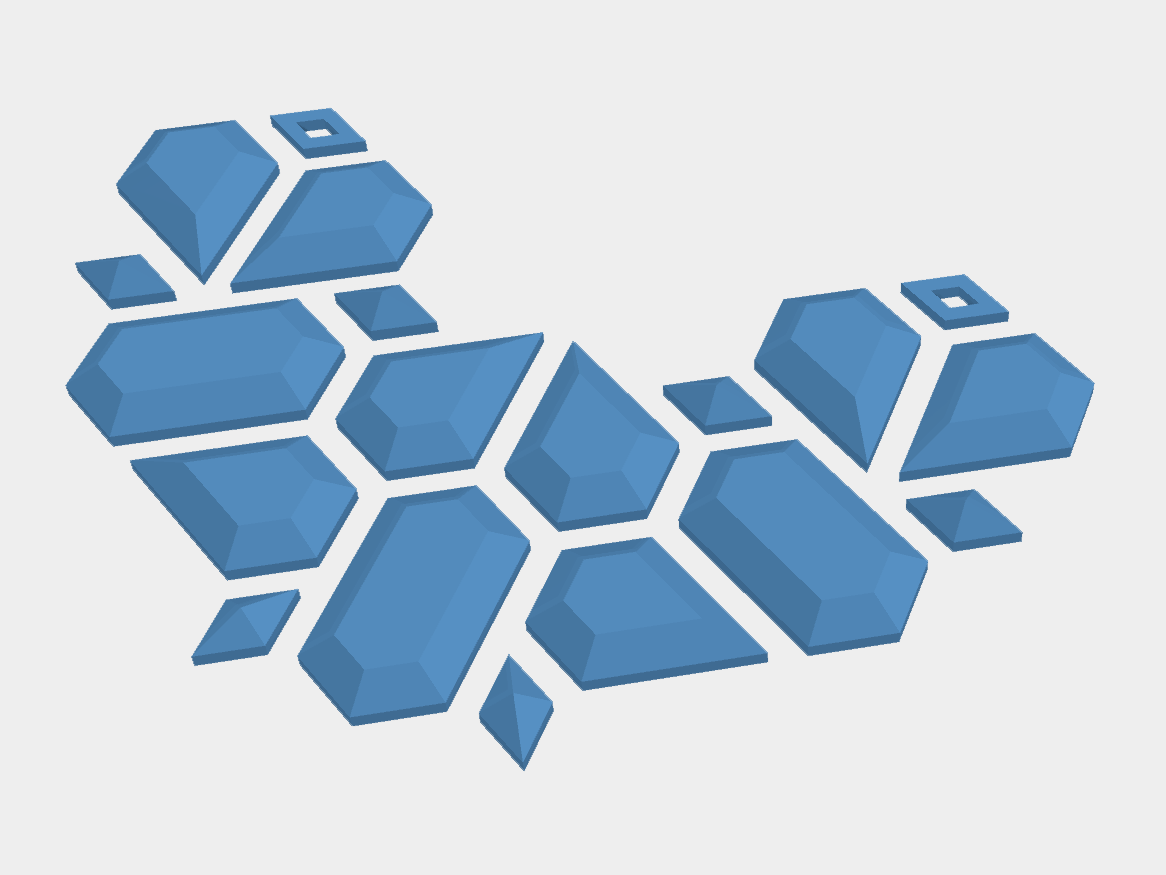
Here I have split a necklace design into many small parts,
and left 3mm between each piece.
Fabric Materials
Fabric has two distinguishing traits that govern its performance: construction, and fibre content.
The fibre content is quite a simple one; if you’re using FDM, you want the fiber of the fabric to be a synthetic fiber so fabric can semi-melt in between the layers: polyester, nylon, acrylic are all likely good choices. Cotton, wool, rayon, linen, silk are not so, though they may work on resin printers (I’ve yet to try) .
The other trait of any fabric is its construction, which describes the way he fabric was made: usually woven, knitted or felted, and the menagerie of subsets beneath those categories. The best fabrics for printing are lightweight, open (and thus semi transparent) knits and weaves. These enable layers of printed plastic to sandwich the fabric and bond to each other through the holes in the fabric. Suitable types include:
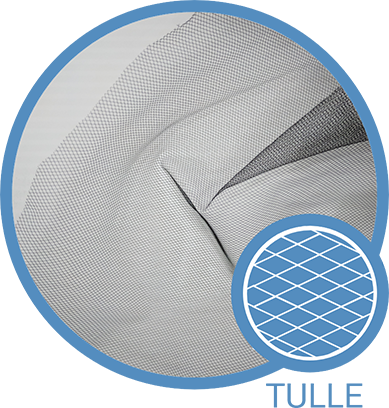
Tulle, which is a very lightweight, delicate, fine fabric mostly used in wedding veils. When viewed closely, the yarns are knitted together in a diamond pattern which won’t fray when cut. Due to its delicacy, it is not suited to applications that require a lot of strength (such as clothing) but it’s great for appliques and items that won’t see too much wear. The right colour in this fabric can appear nearly invisible (like my necklace).
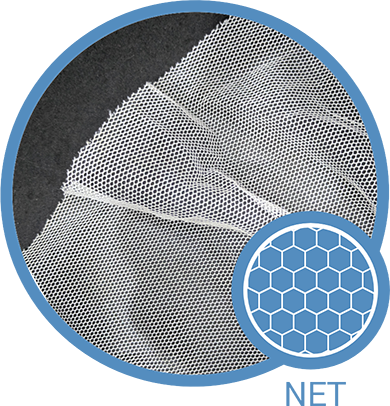
Net is courser and a bit stronger than tulle, while still remaining relatively invisible in the right circumstances. You can get away with it as a construction fabric in clothing. It has a hexagon pattern, won’t fray, usually comes quite stiff and can be washed to soften (like this piece has been).
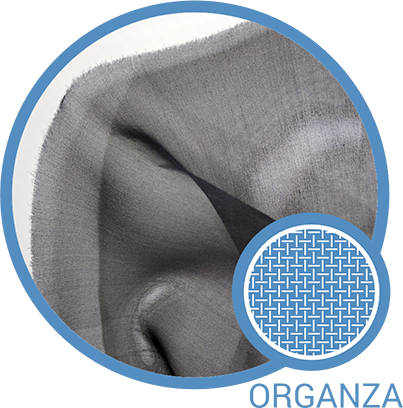
Organza which is plain-woven fabric that’s papery and stiff. It’s a lot stronger than tulle or net, and will stand up to wear as clothing, but will fray, so any edges will need seam allowances.
Slicing Models
Setting your model to slice is very much like most normal prints, only you’ll print with no bed heat, add at least 5 bottom layers, and add the pause (used to insert the fabric) to the G-Code at layer 3 if you so desire.
The reason we print with no bed heat is that the fine fabrics seem to melt too much when they come into contact with the nozzle after having already been warmed by the bed, resulting in breaks and tears in the fabric. I’ve had a lot of fun using exotic PLA filaments such as silk, so feel free to experiment within the PLA range.
Because we are sandwiching the fabric between layers of filament we need to make sure there is enough adhesion to hold the layers together. I recommend pausing at layer 3, and leaving at least 5 bottom layers (layers that are filled in entirely), so that there are 3 layers below the fabric and at least 2 above to hold it tight (feel free to add more).
One thing to note is that on small parts like these, concentric pattern on top layers can mar the surface, particularly when using ironing. This is because the filament stays warm in the centre (due to the proximity to the nozzle) and the nozzle smooshes the filament around as it tries to finish the rest. You can see this in my necklace, below. To negate this ensure your top pattern is set to lines or zig zag.

Here you can see how a concentric fill pattern on the top layer has marred these surfaces.
Potentially the trickiest part of this project is pausing your prints at layer 3 so you can insert some fabric. I must admit, the first few times I tried this technique I just sat by the printer and manually hit pause as that layer started. But you can set it up so the printer automatically pauses and waits for you to hit resume.
I did this in Cura, using a post processing technique, which modifies the G-Code just after it’s been sliced (automatically):
After setting up my model to print, I added the pause by going to;
- Extensions > Post Processing > Modify G-Code
- Then Add a Script > Pause at height
- Change Pause at to Layer No. and set Pause Layer to 3 then hit Close
That’s it! Slice and send it to your printer however you normally would.
You’ll notice when adding the script, there are a few different options. These are for different flavours of G-Code, my printer is running marlin for firmware, so
I used Pause at Height. If you find your printer is behaving erratically after the pause, then try one of the other options (my extruder motor ran backward when I had it wrong).
How to set up the pause function in Cura for machines running marlin.
Printing on Fabric
Now the fun part! Printing!
Before starting print I recommend covering your bed in blue painters’ tape, so you can print atop that. Not only will this help with adhesion on a non-heated bed, but it will also assist you when it comes to remove the print, by enabling you to peel up the tape with print attached, then peel the tape off the print. After applying the tape, re-level and print your first three layers.
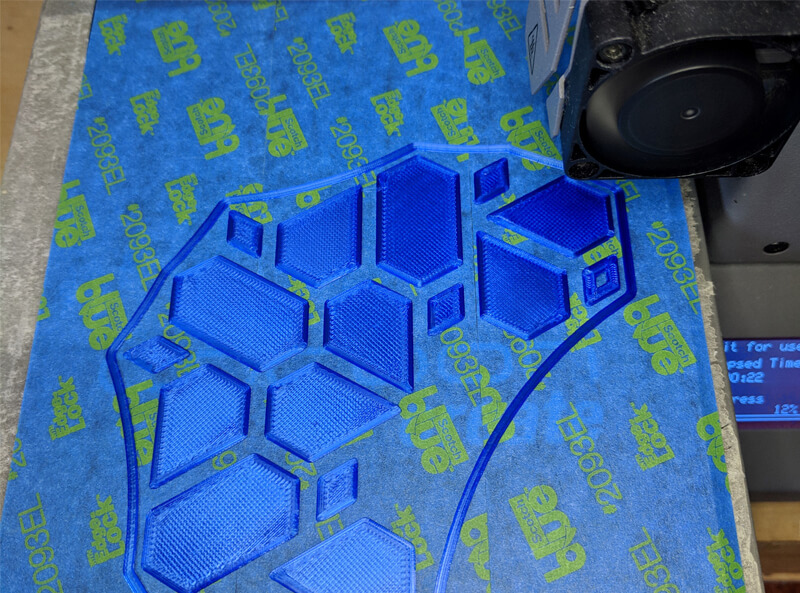
The first three layers have been printed and the print paused.
Then lay your fabric down atop your print and secure it with masking (paper/painters’) tape. Ensure it’s very flat, and that your tape doesn’t overlap any parts of the print (you’ll notice that I’ve gone over the skirt here, that’s fine). Remember if you’re using organza or plan to sew it onto something, leave a decent seam allowance of fabric around the print (at least a centimetre or so).

Tulle has been lain atop the first 3 layers, and then secured with tape
If you bump bed during this process you can usually have the printer re-center itself after applying the fabric and tape by resuming the print, then as soon as it starts to move to continue the print, pausing it again (which will make it home), then resuming it again to finish the print.
The print has been resumed after fabric has been inserted.
Once the print has been completed, be sure to remove it carefully, especially if you’re using tulle. This is where the blue tape really shines, as there’s no need to try and remove the print with a paint scraper and risk tearing the fabric. Be sure when lifting the blue tape to pull each strip of it evenly at the same time as those next to it, so as not to tear any fabric that may lie on the edges of the tape.
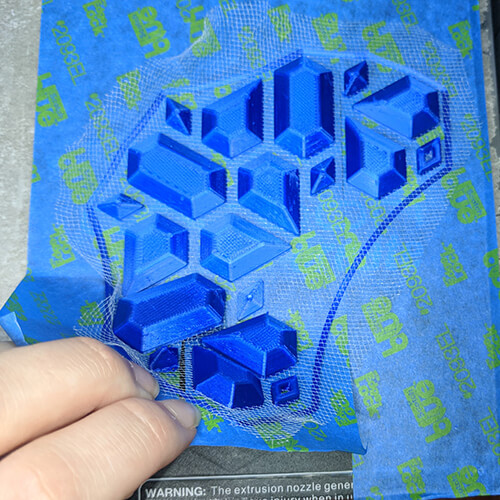


From left to right: Removing the print from the bed by lifting the blue tape. The removed print before the excess fabric has been trimmed. In this case I trimmed the excess from around the print and will attach a chain to form a necklace.
What Next?
It’s still early days for this technique, so please feel empowered to experiment with new ideas! I think it would be cool to try out this technique on a resin printer, and maybe even include some glitter into the resin, like I did in my “opal” print. Shorey has also done cool things with changing filament colours as the print progresses, creating spikes with eye-catching tips. He’s also experimented with different materials, like lycra. I think there would also be value in testing out some powermesh, which is a lightweight, sheer, but extremely stretchy and strong fabric used extensively in dancewear. Polyester georgette or chiffon may also work, but may prove a little trickier to wrangle as it’s very soft and slippery.
I’m sure there are heaps of other possibilities to explore that haven’t occurred to me, and I’d love, love, love to see what you come up with! So if you try out this technique, please drop me a line! I help moderate the 3D Printing sub-reddit and Discord, so I’m very active in those circles, so feel free to make a post, or reach out to me there.
And if you get stuck anywhere along the way please feel welcome to reach out to me, or the greater community on 3D printing sub-reddit and Discord. I hang out in both a lot, as do many other helpful folk. I also occasionally hang out on Imgur, Thingiverse and Twitter if you don’t use reddit or Discord. :)
Much love and happy printing!
Billie Ruben <3